3.6 Creating and adding an SSH key to your Github account
In this tutorial, we will learn step by step how to create and add an SSH key to your GitHub account.
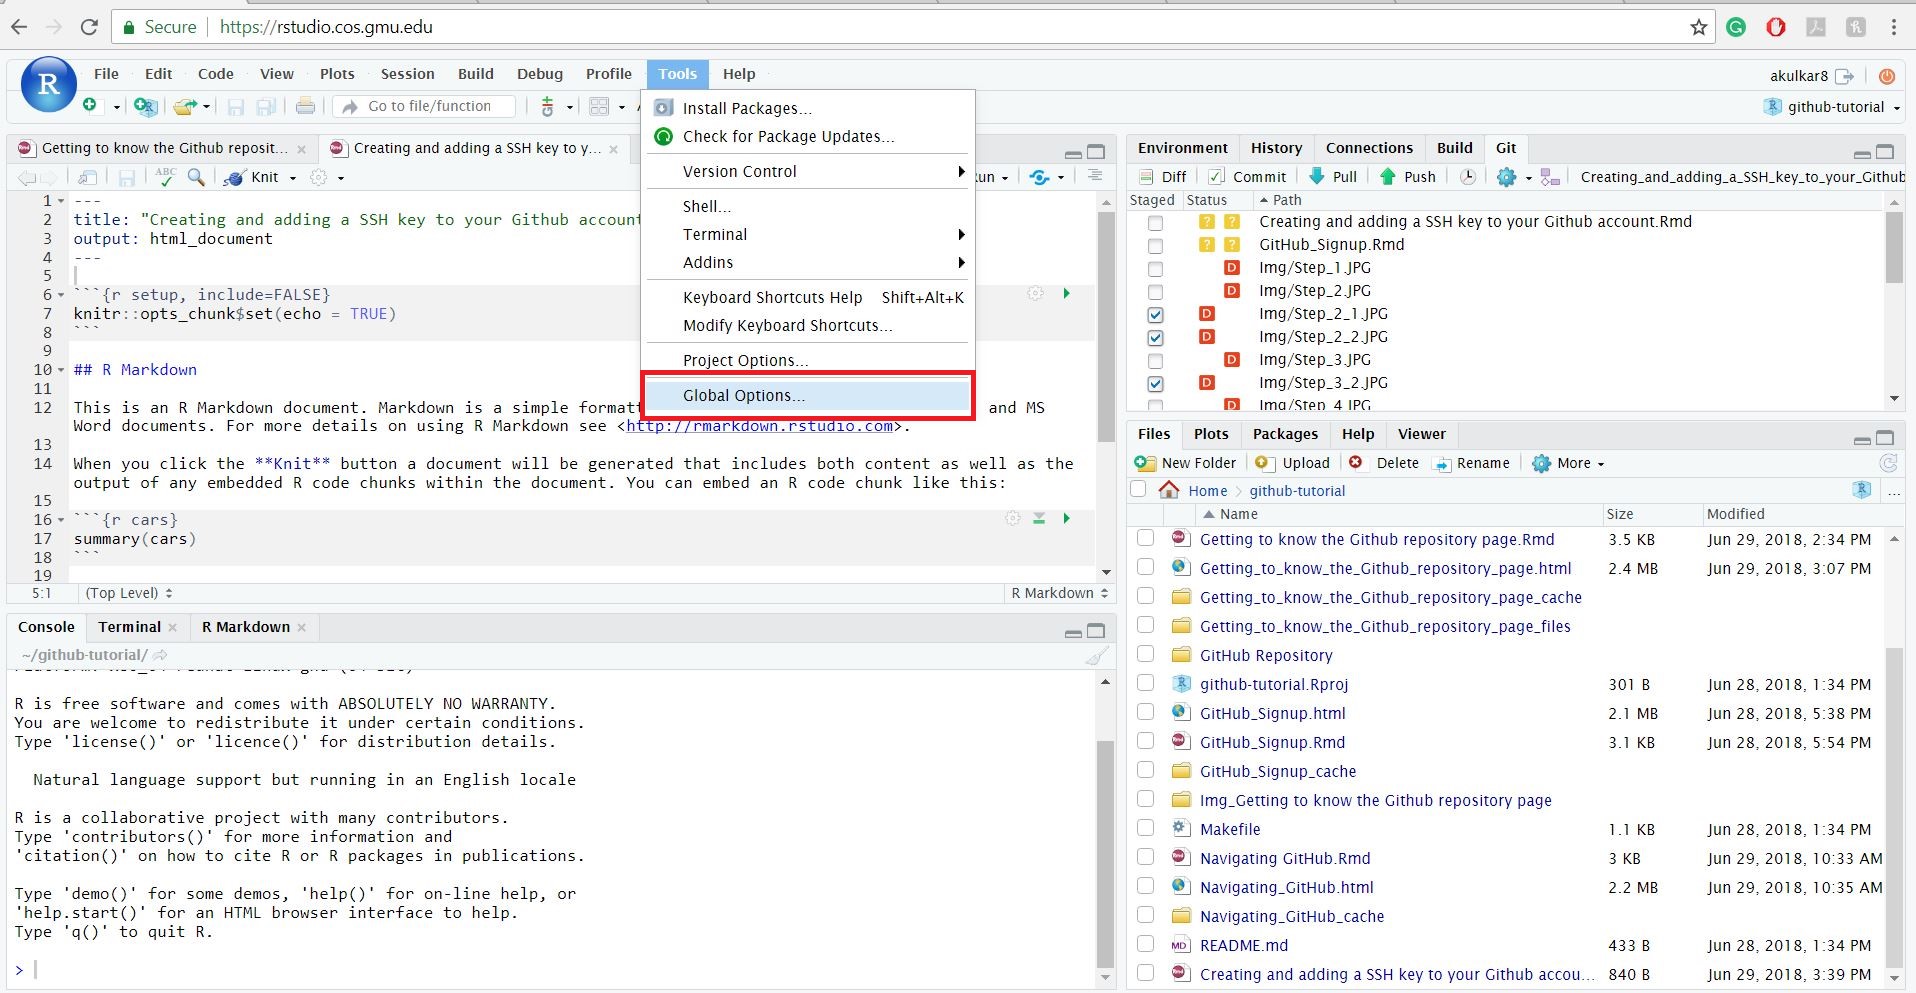
Log in to your RStudio Server account on https://rstudio.cos.gmu.edu/. When RStudio Server will start then click on “Tools” option in the menu bar and then click on “Global Options…”
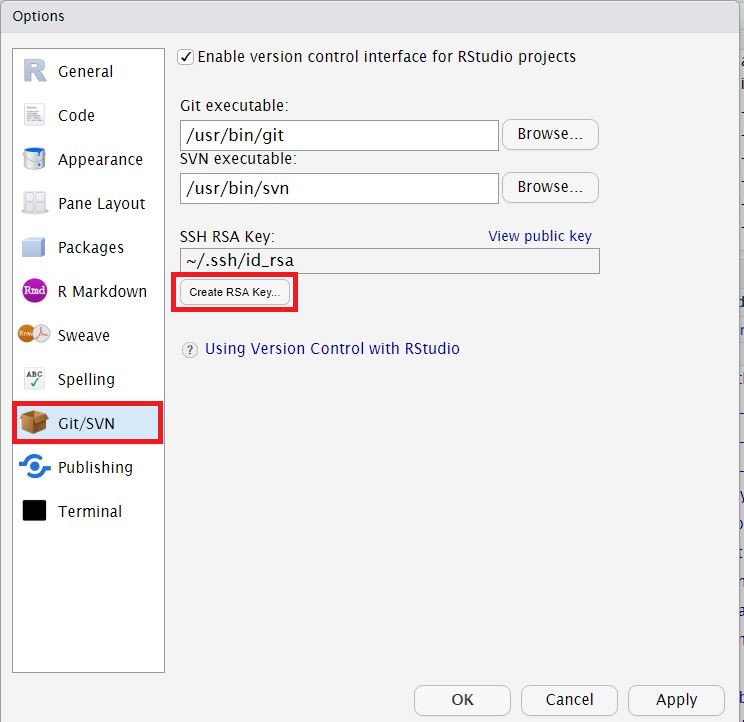
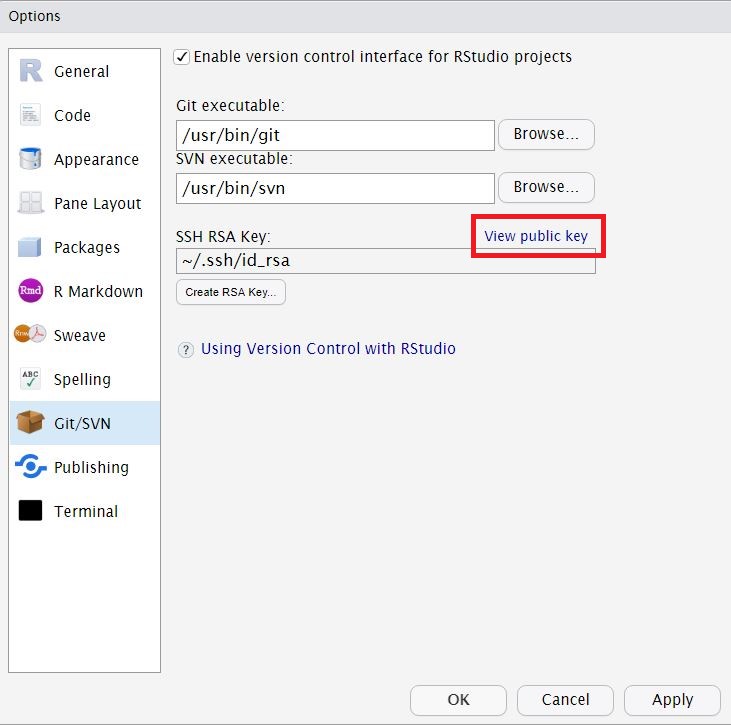
After clicking “Global Options…” you will see a new window containing different options. From that window click on “Git/SVN” which will be present on the left side and then click on “Create RSA key”.
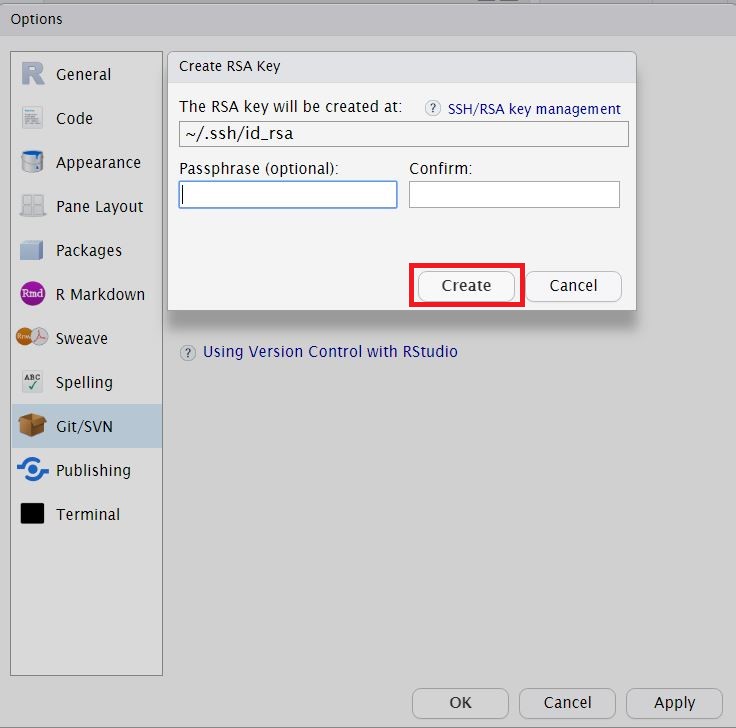
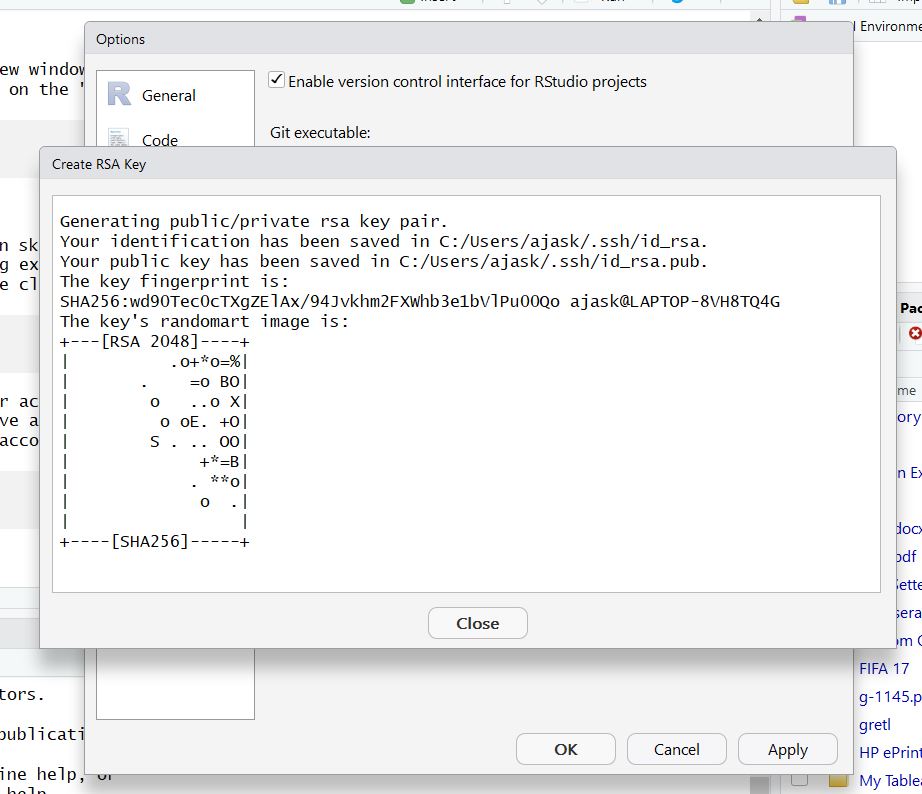
A new window will open, and there will be two textboxes. One textbox will be for entering a passphrase, and other will be for confirmation. Adding a passphrase will be an optional part. After that click on “Create” button and a new window will appear containing information about RSA key pair. Now, you can close that window by clicking on “Close” button.
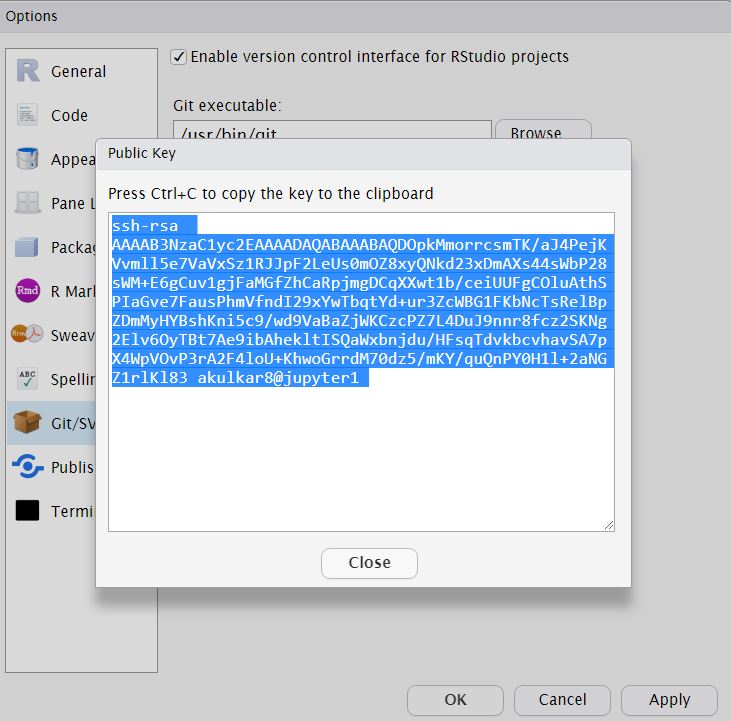
Click on the “View public key” option which will open another new window containing public key. After opening that window copy the public key and close the window.
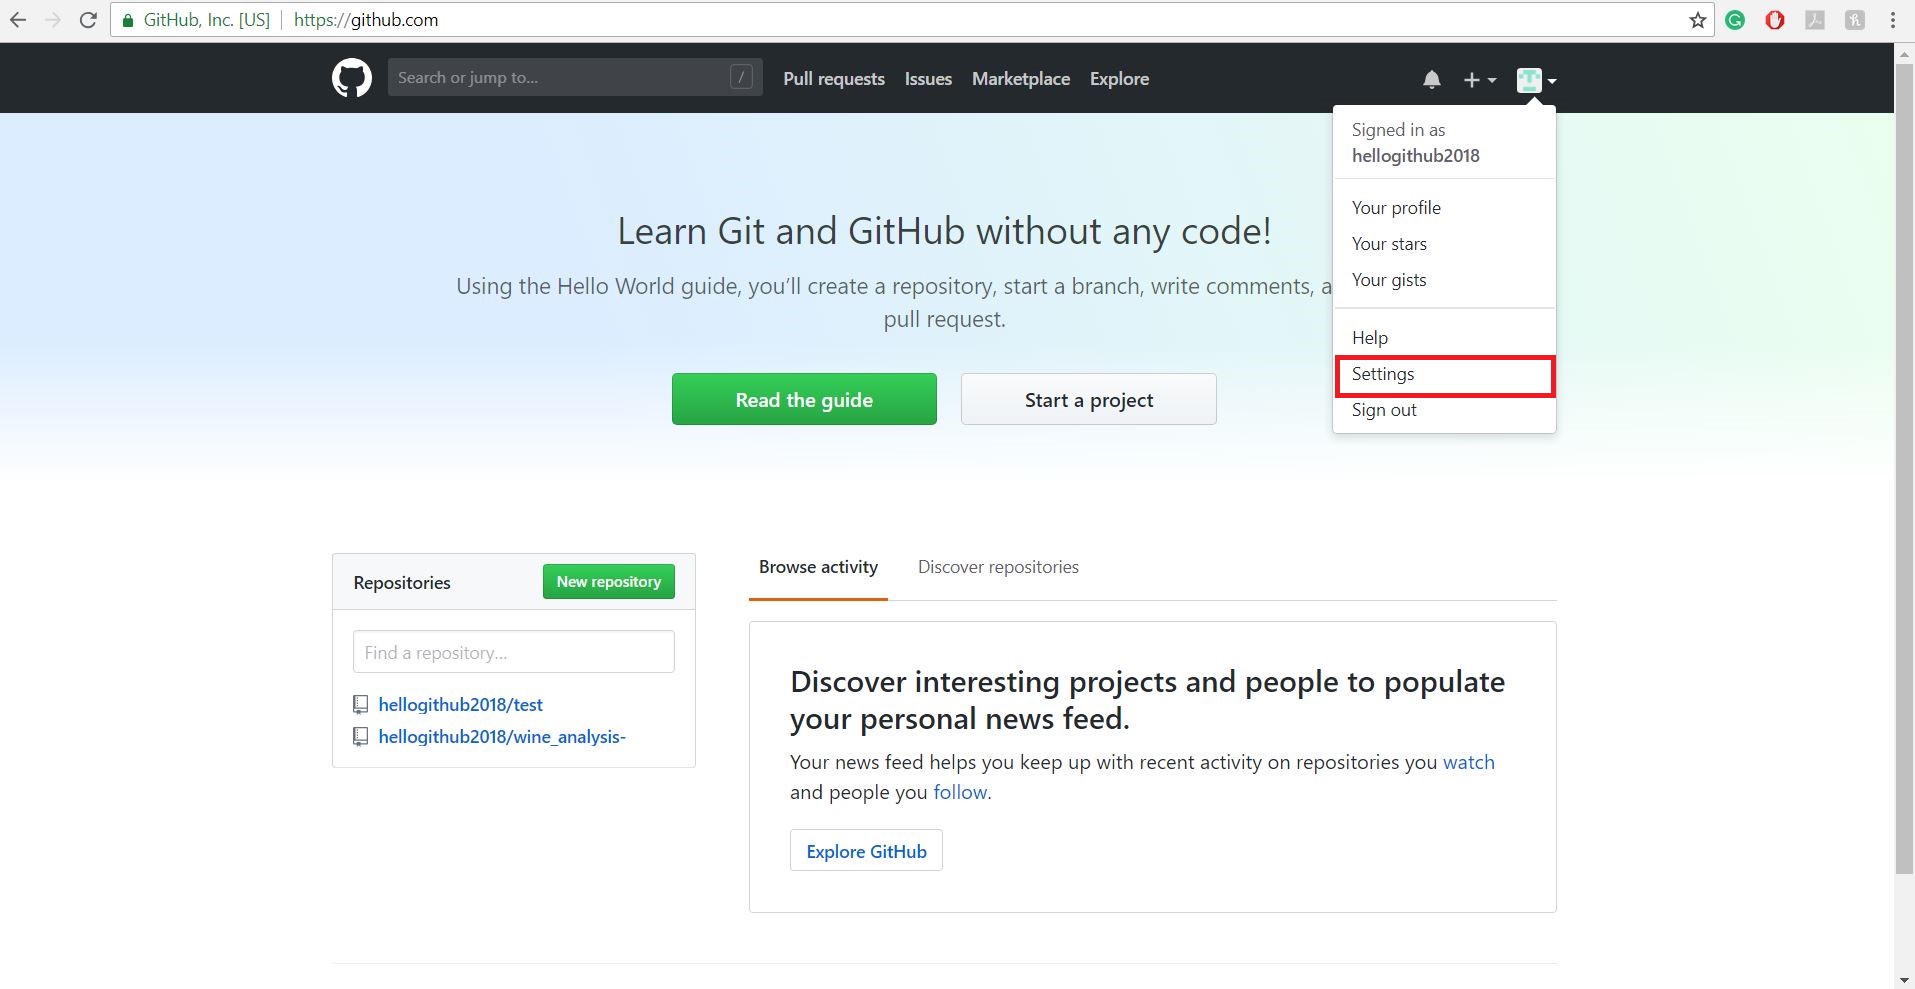
In the last step, we successfully generated a public key. Now, we need to add that public key to our GitHub account. To do that go to https://github.com/ and login to your account. After logging in click on your profile picture and then click on “Settings” option in the list.
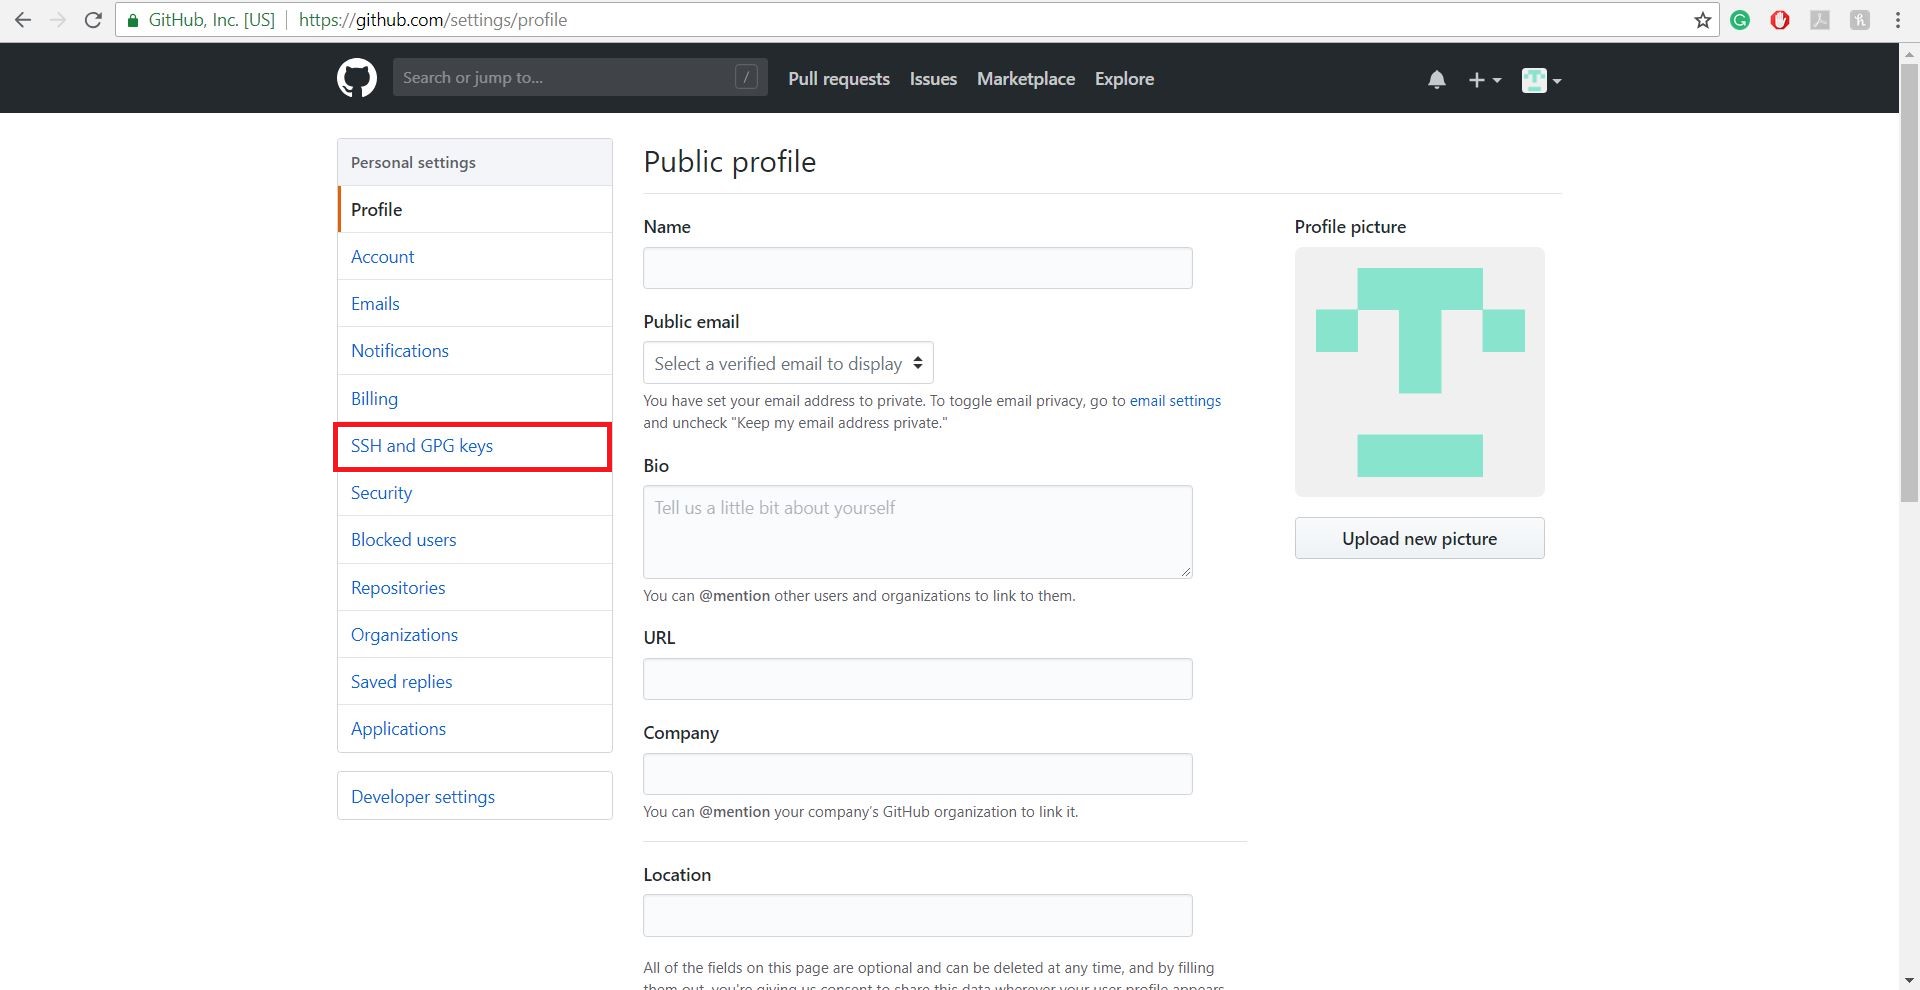
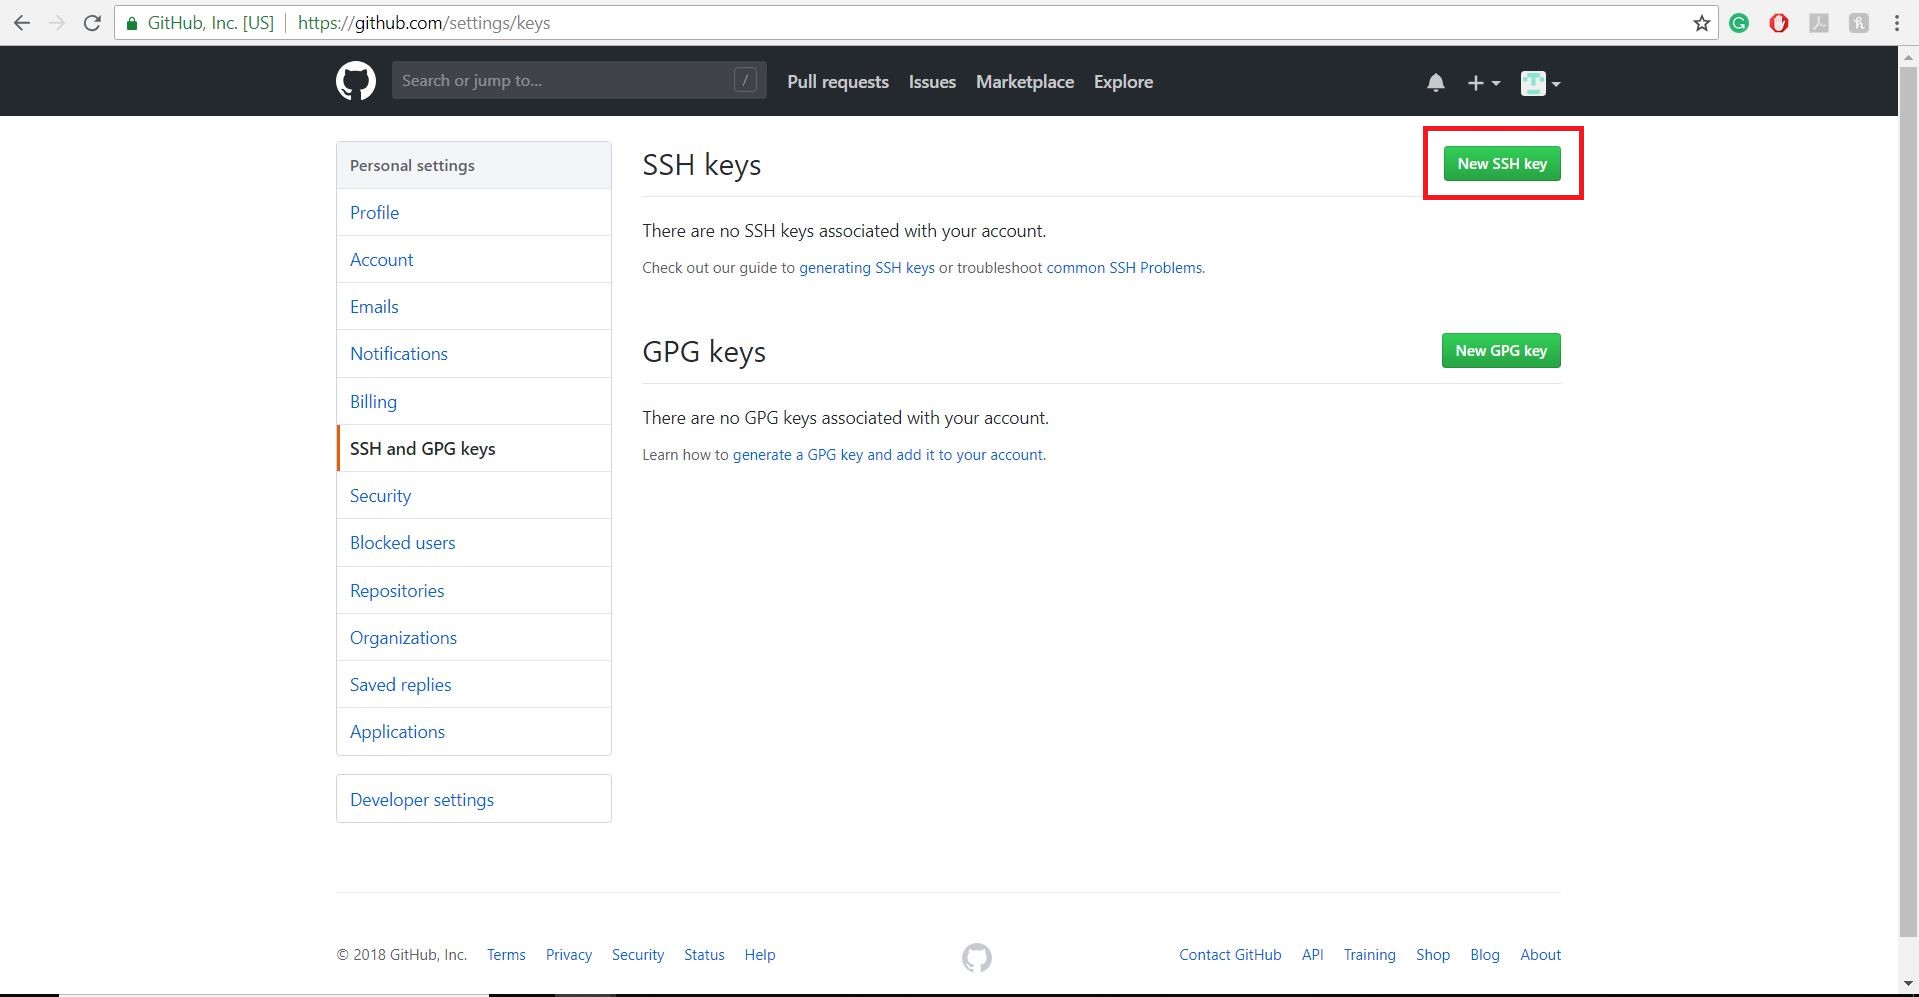
You will see a list of options to configure your GitHub account. Now from the list click on “SSH and GPG keys” option.
There will be two sections SSH keys and GPG keys. Click on “New SSH key” button.
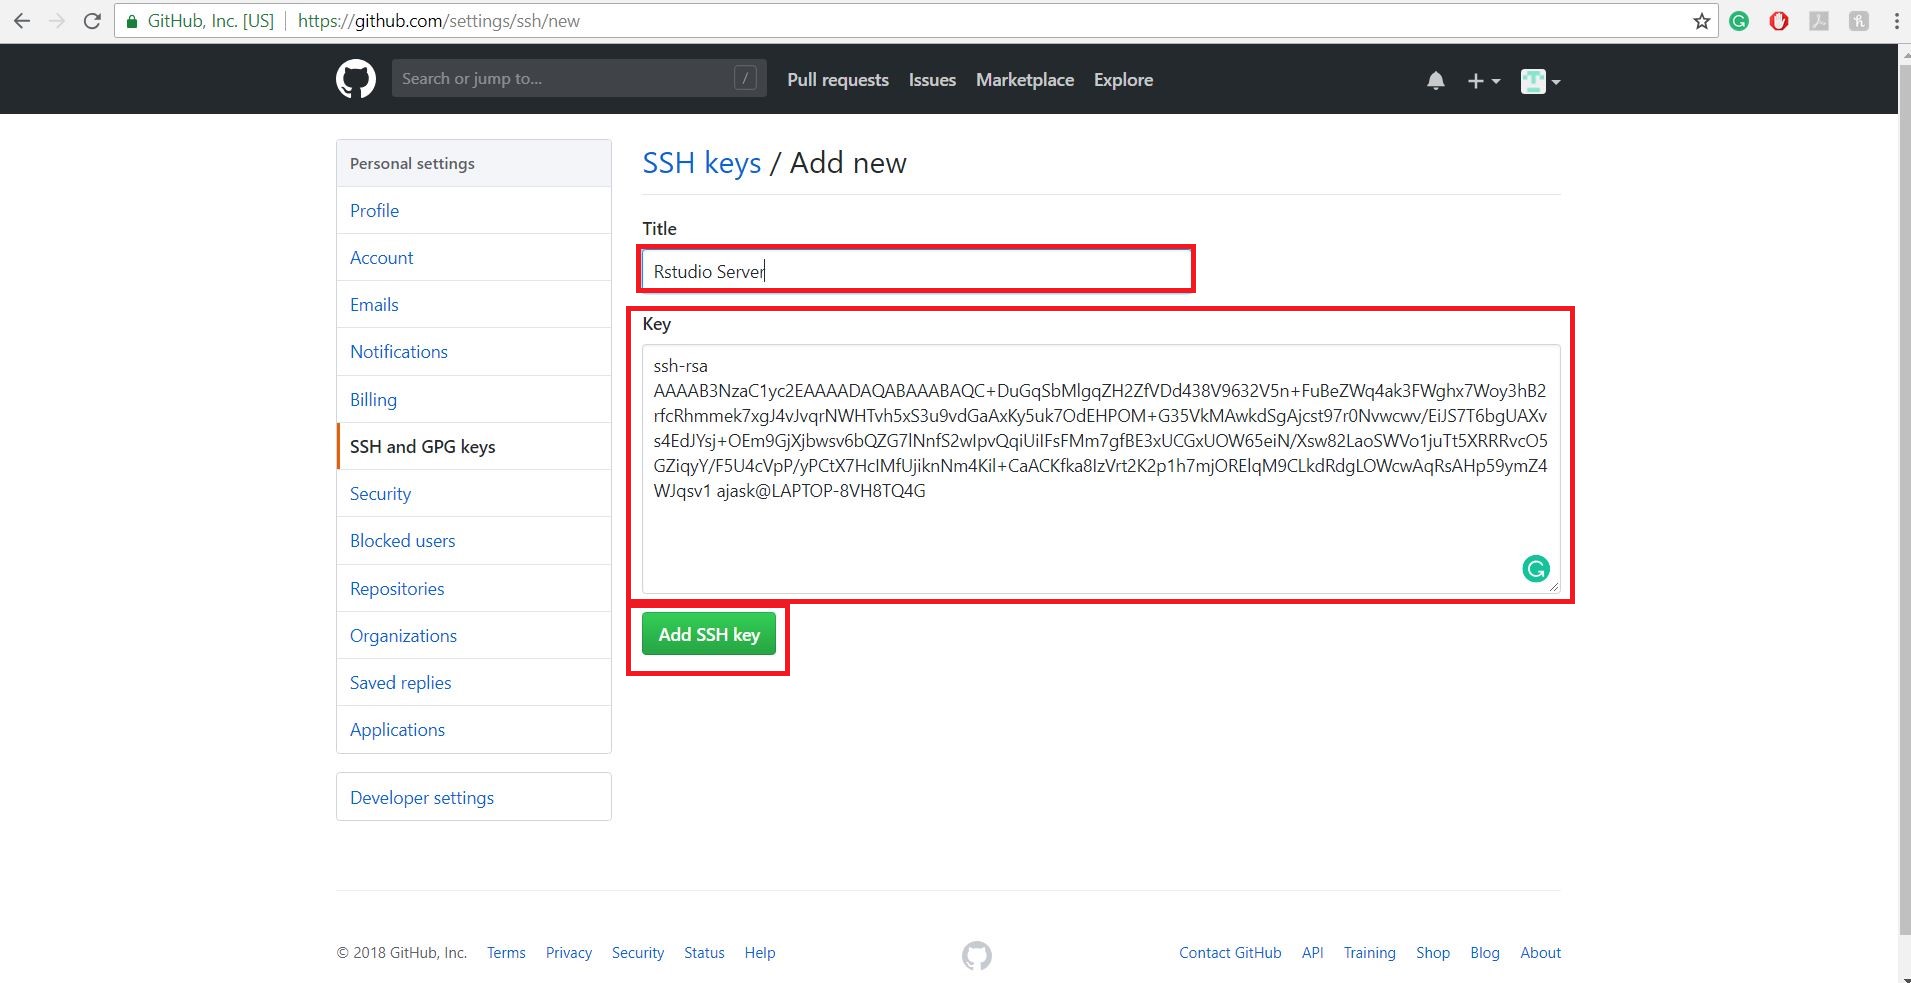
After clicking “New SSH key” button, we need to specify details of SSH key. In the first textbox, you need to give a title to the key and in the second textbox paste the copied key. After entering these details click on “Add SSH key” button.
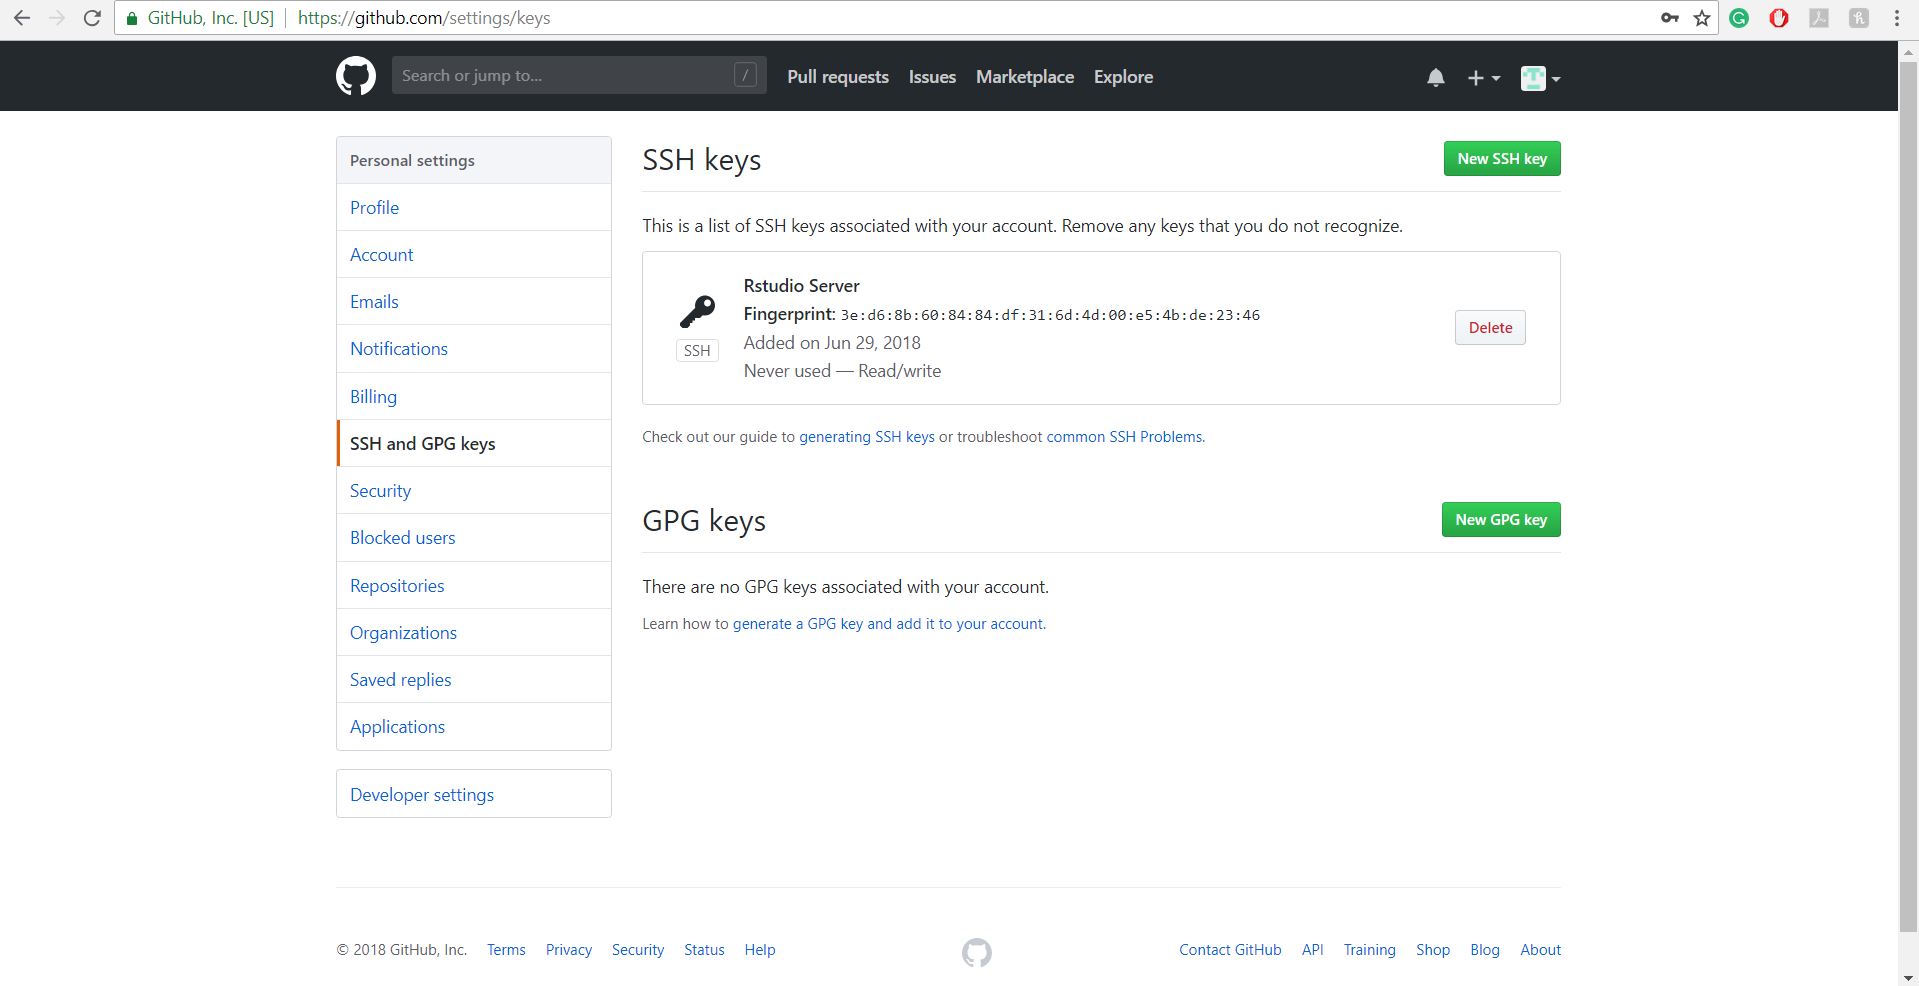
If all the steps were followed correctly, then you will see a key in SSH keys section.
If you have any questions or concerns, then please contact your instructor.