3.2 Navigating the GitHub site
For your convenience, the course website contains links taking you directly to course content stored on GitHub. However, you may prefer to access your existing content by navigating the GitHub site itself, so let’s take a short tour of the GitHub interface.
3.2.1 Main dashboard
When you will login into GitHub for the first time you will see the main dashboard for the website.
At the top of the dashboard there are several buttons, boxes, and icons that you can click in order to navigate the site. Starting from the left,
GitHub icon: This is similar to the “Home” or “Main” buttons found on other websites. Clicking this icon brings you back to your currently active dashboard, which is what we’re already viewing.
Search bar: Used to look for content on the GitHub site, such as repositories and user accounts, just click it and start typing.
Pull requests, Issues, Marketplace, and Explore: Of these links, the only one you might use for the course is “Pull requests”, however we’ll save the discussion about Pull requests for another time.
Bell icon: This displays your account notifications, such as when someone tags your username.
Plus icon: Used for creating content, such as creating a new repository.
The last icon on the right is your profile picture, and clicking it opens up another menu containing some additional links.
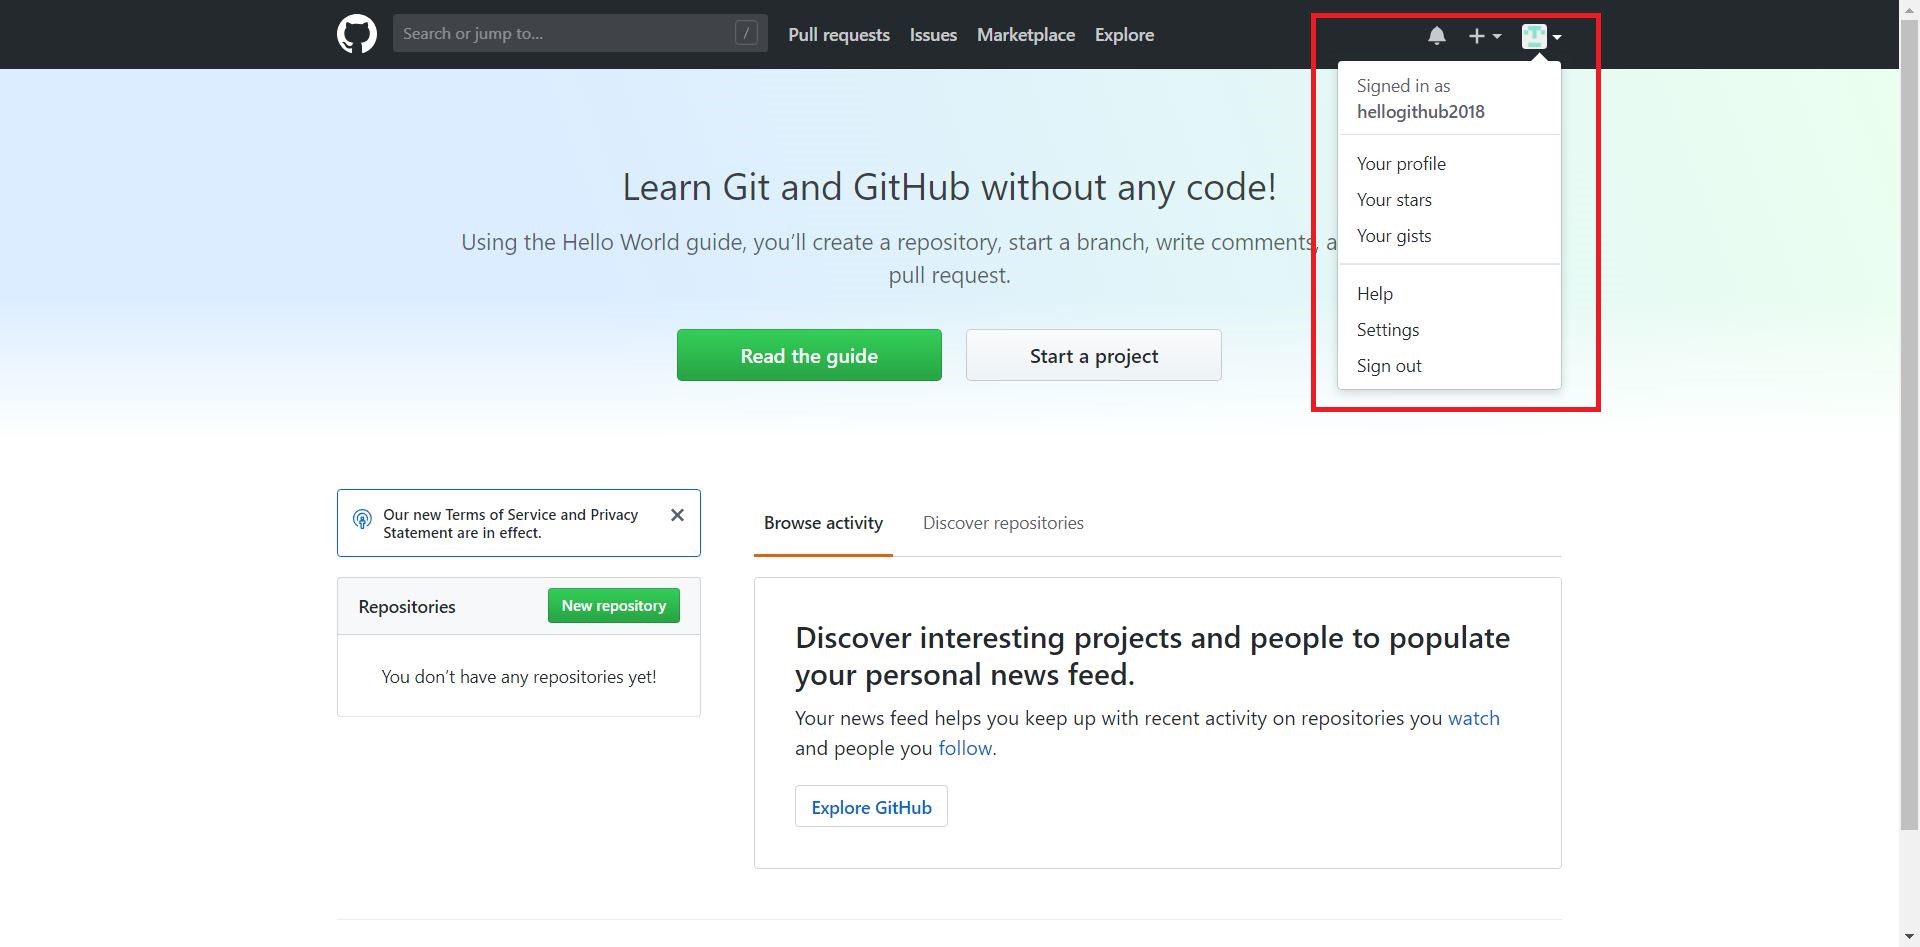
From this menu you can reach your profile, account settings, the help section, and a couple other of other pages. Let’s take a quick look to see what the profile and settings pages look like.
3.2.2 Profile page
Clicking Your profile will take you to your account’s profile page.
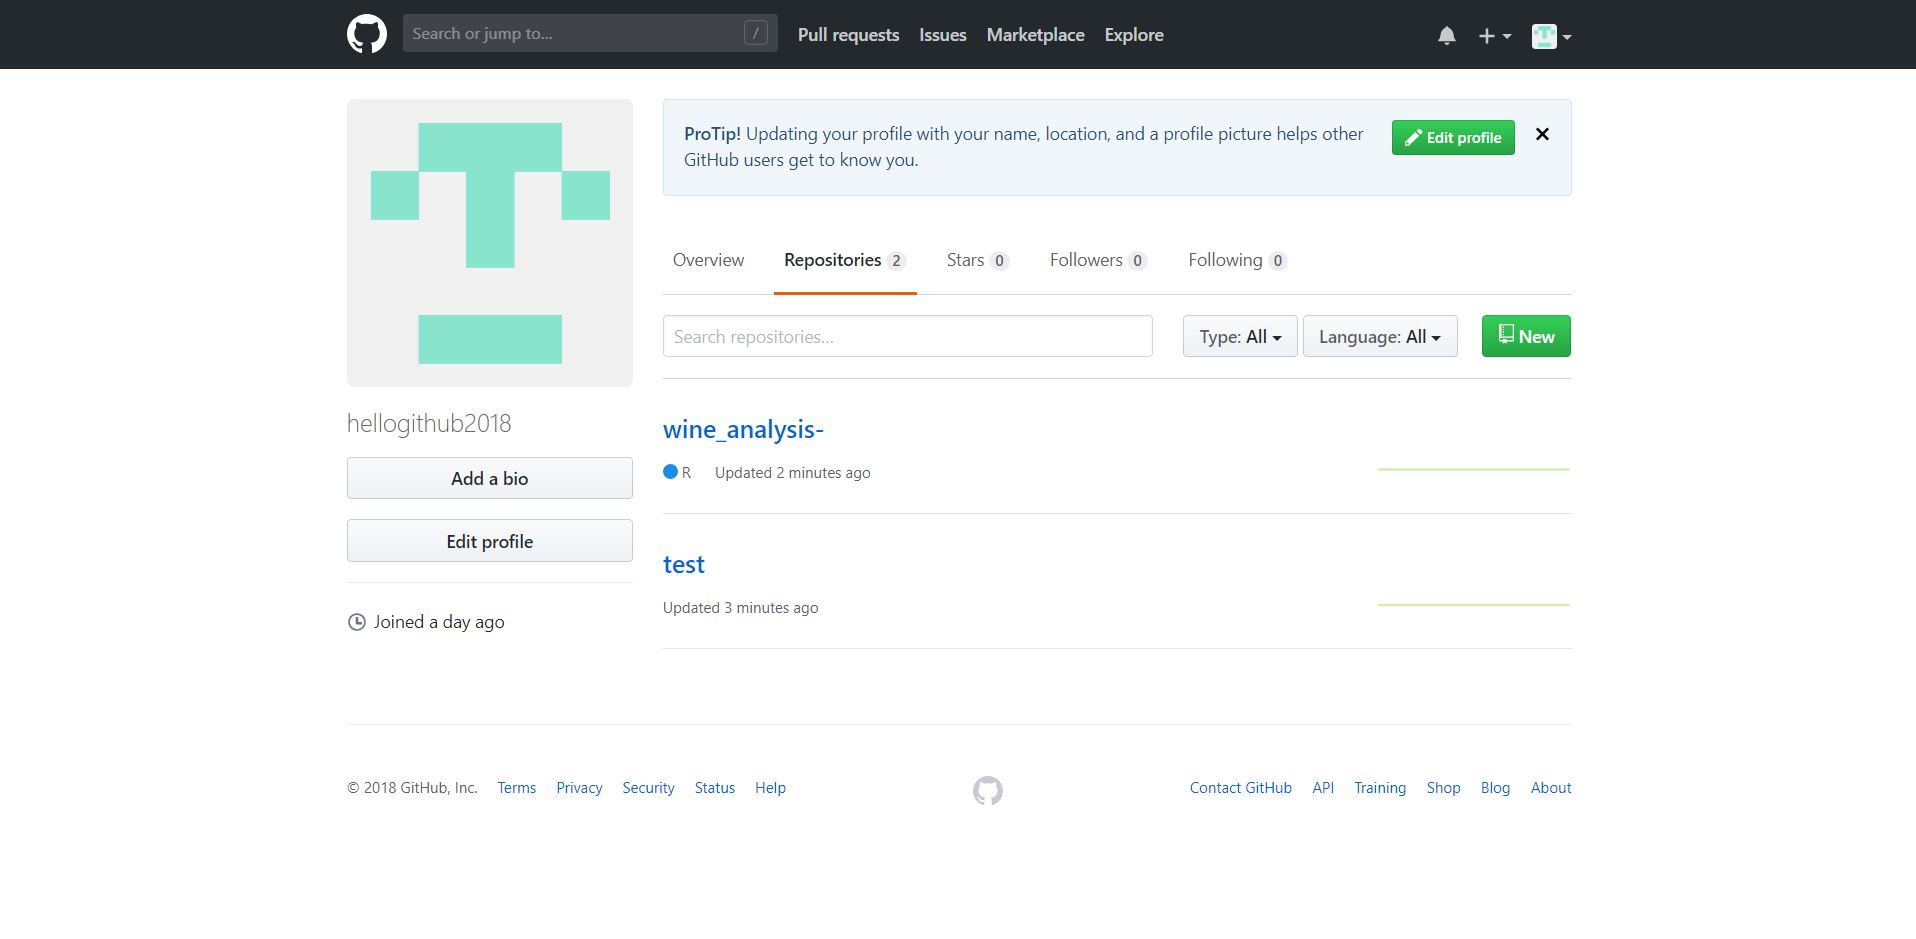
Since you most likely have a new account, there won’t be much here right now. If you click the Repositories tab at the top of your profile, it will display a list of repositories associated with your account, however keep in mind that it will not have any content you work on for the class. This is because the repositories you create for the class assignments are created under the class organization rather than associated with you. This is important to keep in mind when you are looking for your files - see below for how to find your class assignment repositories.
3.2.3 Settings
Clicking Settings takes you to the account settings page where you can inspect and update your account settings. Use the menu on the left to choose the setting you would like to change.
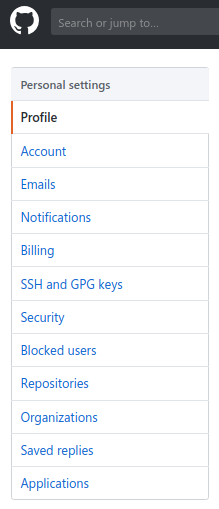
For now you may want to upload a profile picture or add a short bio under the Profile setting. You can also change how the site sends you email updates and notification alerts under the Emails and Notifications settings.
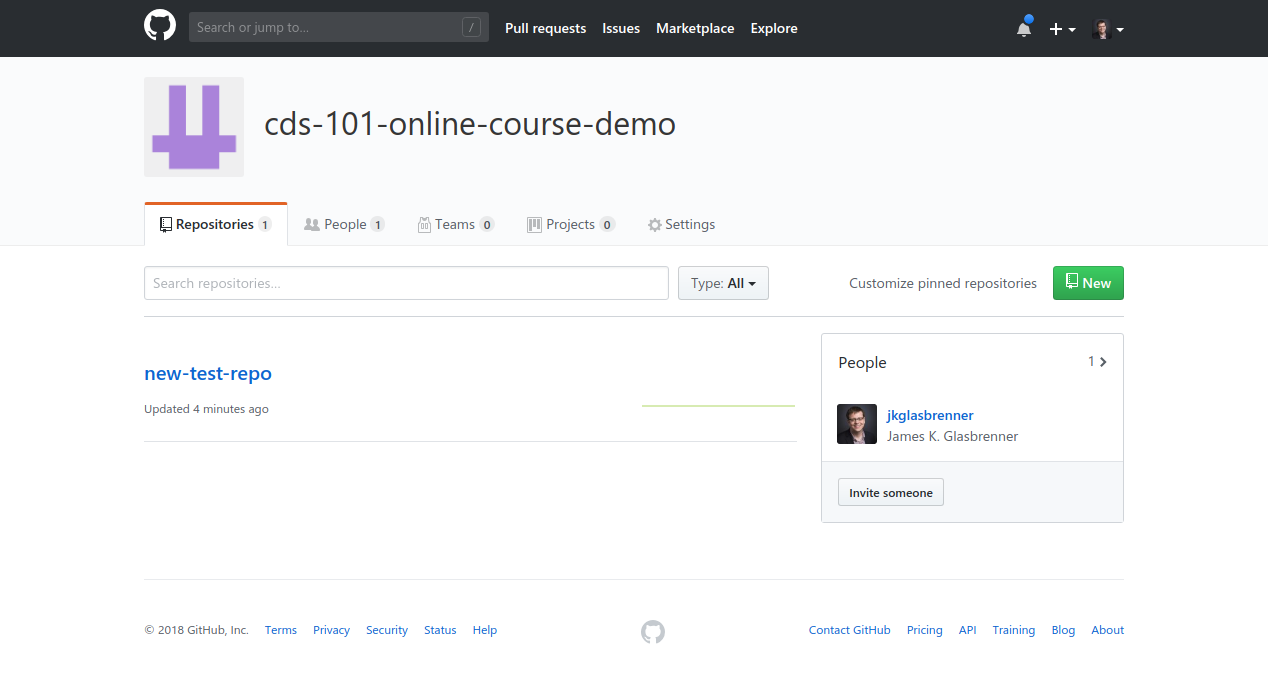
3.2.4 Class organization page
Returning to the main dashboard, after you’ve complete a few of the assignments for the class, your dashboard will begin to look more like this.

As we learned while looking at the profile page, your classwork will not be visible there. Instead, you will need to navigate to the class organization in order to find your files for the class, so let’s do that now.
Your section’s organization (for CDS 101) will be at a URL like this:
- https://github.com/mason-sp20-cds101-001
- https://github.com/mason-sp20-cds101-002
- https://github.com/mason-sp20-cds101-dl1
- https://github.com/mason-sp20-cds101-dl2
In these examples, sp20 stands for the Spring 2020 semester, and the last three digits are the number of your section.
When you navigate to your appropriate class organization page, you should see a page similar to this:
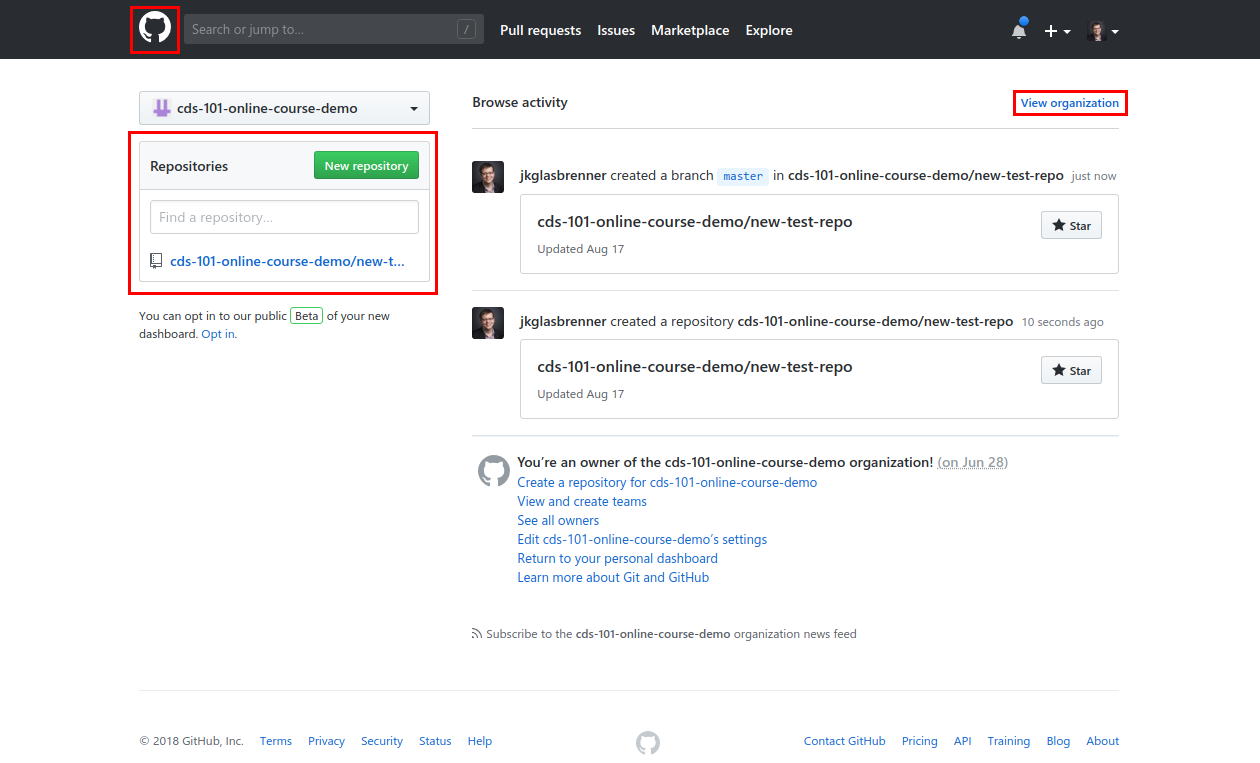
The dashboard is similar to the dashboard we saw earlier, but it will only contain content associated with the class. On the left you will see a list of some of your class repositories, which you can filter by typing in the Find a repository… search box. If you don’t see any repositories there, don’t worry, we will get around to creating them soon enough!
To see a full list of your class repositories, similar to the repositories tab on your profile page, click the View organization button on the upper right of the page.
Here you should be able to find all of the repositories that you’ve used during the class.
Keep in mind
If you click the GitHub icon while you are accessing content in the class organization, it will bring you back to the class organization dashboard, not the main dashboard we saw earlier. To get back to the main dashboard, click the gray icon with the class organization name and then click your username in the dropdown menu.